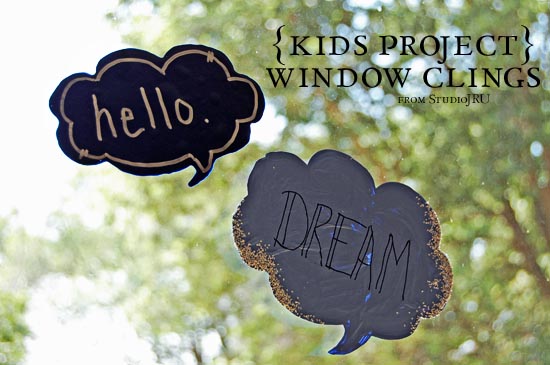
I am so happy to have one of my sweet friends and amazingly talented friends, Jennifer, from StudioJRU add to our repertoire of ideas for Kids’ Boredom Busters. Although as I looked over what Jennifer has done for us, why limit this to a kids craft? We could all have fun with this project. Check out Jennifer’s site, and be inspired.
![]() I was so happy when Jen asked me to be here today to share a fun project! When I am cleaning up my painting palettes, I always notice how ‘clingy’ the dried paint is. It sticks to everything! So I thought, why not use this idea as a fun and intentional project?!
I was so happy when Jen asked me to be here today to share a fun project! When I am cleaning up my painting palettes, I always notice how ‘clingy’ the dried paint is. It sticks to everything! So I thought, why not use this idea as a fun and intentional project?!
You need just a few materials for you and your kiddos to do this project.
Page protectors
Print outs (optional)
Plastic bag
Paint brush
Old lid or other paint palette
Craft paint (the cheap kind)
Decoupage
Glitter, small beads, makers (optional)
A little patience for drying.
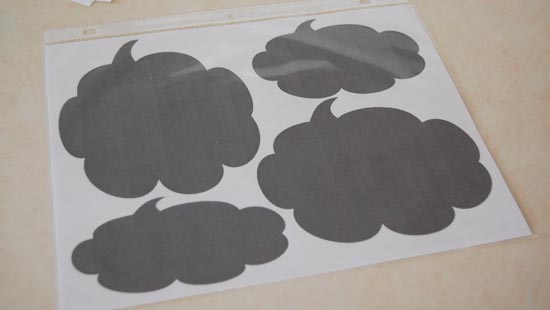
You can use these PDF images to print out and use as patterns to paint over. You can also just have your children paint their own shapes. To print, simply click on the image and you will be given the option to save or print PDF file.
If you printed the patterns, slide the page into the page protector. You can tape the page protector down if it would help.
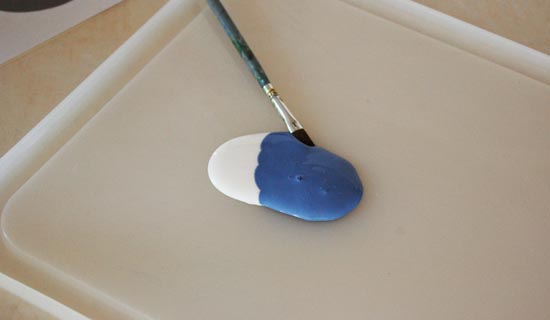
There is two ways you can do this. For this option, pour decoupage and paint onto a plastic lid or other painting surface. I used a 2 part paint to 1 part decoupage ratio. The decoupage gives the paint more of a plastic-e finish. You can clean decoupage and craft paint while wet with soup and water. 🙂
Next paint onto the page protector with your decoupage and craft paint mixture.
While the mixture is still wet, you can add glitter or beads right into the paint. Let sit to dry… a few hours to overnight. This is where the patience comes in. 🙂 The thicker of a paint layer you can get, the easier it will be to work with. When it is too thin, it can stretch out of shape and can tear when you try to pull it up.
The second option is to pour your 2 parts craft paint and 1 part decoupage right into a plastic bag. Mix it up in the bottom of your bag.
Cut the tip off of the bag and squeeze the paint onto the page protector.
This option gives you a smoother finished window cling, but it does take overnight to dry.
Once dry, you can write on the quote bubbles or decorate the shapes with markers.
Carefully get a corner of the design pried up from the plastic, it will then peel right off. If you want to make your own shapes, you can also cut shapes out after you peel them up. Then stick them onto your windows!
They also stick nicely on mirrors. What a sweet way to leave messages around the house!
I hope you have fun with this project and I hope you have many happy decorated windows in your future!
By Jennifer, StudioJRU


This is awesome! We can do it for every holiday – so much more fun than store bought clings!
These are really cute. I can’t wait to try them.
I might use these for the office!
This will be a go-to craft for our home school. Thank you!!
Super cute, Jennifer!! Fun idea!
Don’t know where else to ask this, but have you ever done a mural on blinds?
these are so cute! i’m going to have to share this with my daughter… i’m sure my grandsons would enjoy this! =)
These are so cute!
Love this idea. So fun. Pinning it right now.
Another winner project! I am looking forward to sharing it with all my friends, older n younger alike!
Thinking these would be fun on the picture window over my husbands favorite chair. Hmmm all the sayings we could make him say… They would be cute in pictures too.