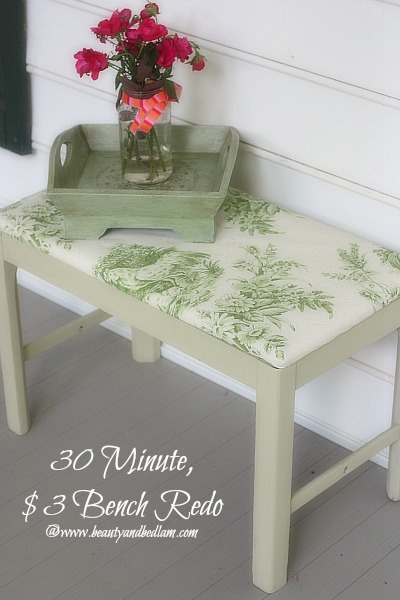
Why, oh why, do I let myself think that tackling a DIY project is going to take all afternoon? It’s a lie, I tell you, a lie. Every single one of you can transform an ugly, old $3 yard sale find into something spectacular in just 30 minutes. (And that includes drying time.)
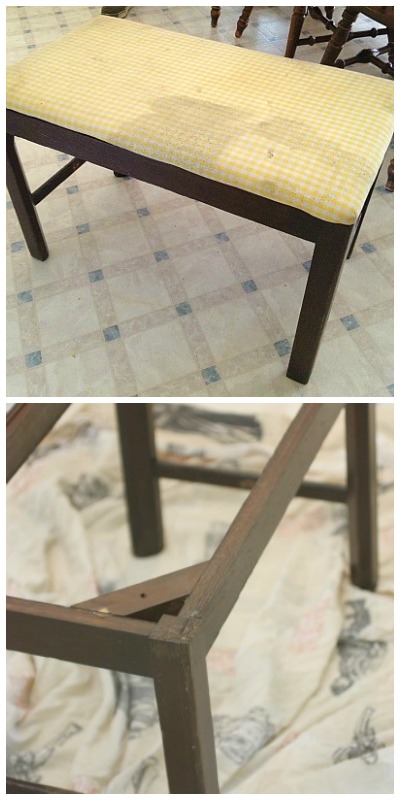
I’ve been glancing at this trash treasure find for two months now. It’s been snuggled all up on my porch screaming for a little love, but I’ve been plugging my ears.
Why does it always take a house full of people coming over to distract me into a non-essential project that I’ve put off for months? It happens every time I have more than 30 people over. I think it’s my way of avoiding all the cleaning and cooking I have to do. I find anything to take my mind off that, and nearly instantaneously, the bench project must be completed – yesterday.
I’ve been buying up benches left and right for our new front porch (well, three, but that feels like a lot). They are perfect for extra outdoor seating, yet they don’t take up quite as much room as a chair.
This project declares the true essence of what it means to shop the house and use what you have on hand. As much as I wanted to purchase some fun, outdoor fabric, people were coming…soon.
So I used what I had on hand. I know you’ll never believe it, but that is not even “fabric.” It’s actually a roll of extra thick, almost vinyl like, wall paper that I purchased at a yard sale last year for $1. It’s been gathering dust waiting for that special day when it could shine and it finally came.
I can’t even believe I thought of using it, but I knew I wanted something weather resistant, since I didn’t want to bring the bench in and out, and just the day before I moved the paper from one corner to the next when I was “cleaning.”
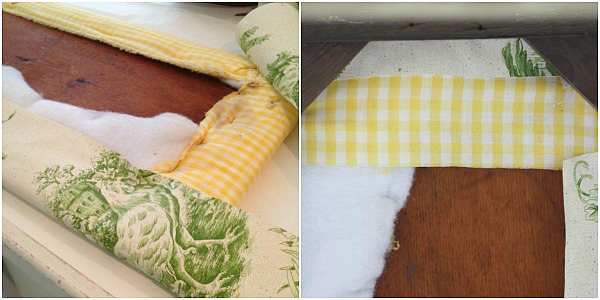
Re-covering a bench cushion is the hardest part of this redo job and I am no expert. If you are tentative, just practice wrapping the corners on a few “presents.” That’s basically the skill set. If you can get neatly wrapped corners, you can do the bench. Plus, remember that no one sees underneath, so pull tight and staple away. That’s the key – pulling the “fabric” tight. I stapled right over the fabric that was already there. No need to make more work for myself, but do make sure you remember where the screws are for when you put it back on. (Not that I would forget that or anything. ;))
Guess what? Even the staple gun I used was from a yard sale that I attended three weeks ago.
The price? He didn’t even have one on there, so when I asked him if it worked. He said, for $0.50 – sure. I had one already, but you never know when it might break. 🙂
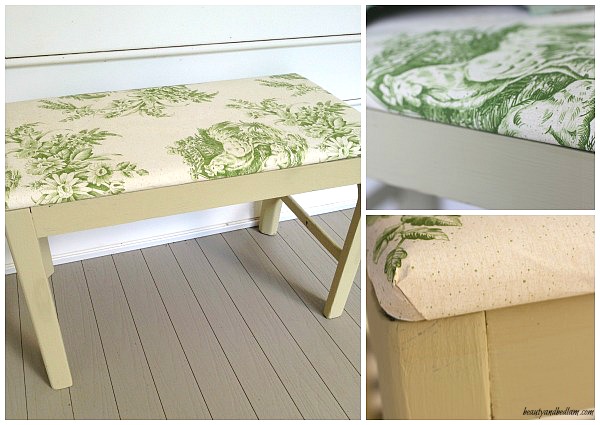
I used an already opened sample pot of Annie Sloan Chalk Paint, which meant I didn’t have to sand or prime it and voila, a trash to treasure masterpiece.
Remember, just use what you have. Most of us have paint or scrap fabric laying around. If I didn’t already have AS chalk paint, I would have just used the 2 in 1 Spray Paint (Paint and Primer in One). I love that stuff and it is perfect for smaller projects like this.
It took 15 minutes of work and 15 minutes of dry time, so why, oh why, do we think projects like this are a bother?
It made my heart do a little flip when guests pulled it up, sat down, and then spent hours chatting away on our front porch. Oh the stories that bench will be able to tell.
Now, just give it a try. I know you can do it! The only thing you have to lose is just a few dollars. 🙂


Super cute!! Great inspiration! Thanks!
Nice and handy ideas are always welcomed by me! Thanks!
Hi Jen, that’s cute, off the subject lol, but can you tell me where you can get a grill, like the one u used on vacation, and the size of it? Thanks so much, looooove your blog. Karen
OH Karen – I AM SO SORRY! You so nicely emailed me about that and I got it out and then didn’t have a tape measure. That one is just from Walmart, I believe. I’ve seen them on Amazon for a good price. It’s nothing fancy, but it does have the non-stick surface. I “think” that most of them are around the same size like this 22 inch one. I put the link in here so you can see it. “>
“>
Presto 07039 22-Inch Electric Griddle
Presto 07039 22-Inch Electric Griddle
Thank you Jen so much! Karen
Beautiful! Don’t you just love garage sales?! I think you & I would get along great! 😉 Nearly everything in my house, on me & my kids come from g-sales. I can’t hardly stand to go store shopping bc I just think to myself “That would be $1 or less at a g-sale!”. I just can’t see wasting the money when I think my house & family look great for so much less. Penny saved, penny earned or maybe in should be $5 saved, $5 earned these days!
Oh girl – I am right with you. It’s painful to have to buy things at a store when I know that if I just wait a few more Saturdays, I might be able to find it. 🙂
It’s beautiful! You did such a nice job!
YAY for inexpensive and fabulous furniture makeovers! Looks great, Jen! HUGS.
I have a bench very much like this up in my attic game room area that is just waiting to have new covering on the seat. Thanks for the inspiration. You made it look very easy.
I am always looking for ways to reuse things and make them look pretty for our house. This gives me a ton of inspiration. Great post!
Great use of awesome products that people might have laying around in the house. Awesome post!