Do you remember last summer when I was involved in our fun DITTO DIY?
One of our projects included a Gilded challenge. Yes, we had to gild something or paint it gold. I sure wish that I had thought to do this then. It’s perfect and meets all the criteria: easy and frugal, yet really elegant.
What I love about this craft is its versatility. You can adapt the colors to your own home decor, make baskets for Easter, create jewelry organizers – the sky is the limit. Instead of using newspaper and spray painting the outside of the bowl gold, you can use scrapbook paper, fabric or any other creative medium. Embellish it how ever you choose and use any color paint. Paint polka dots on the inside, or use leaves for the fall, flower punches for summer, you get the idea.
Trust me, paper mache is NOT just for elementary school art class anymore. This is just plain fun, but with guaranteed results.
Stephanie, a home decorating and DIY blogger at Two Zero One shared this tutorial with me and it plays right to my love of simple, beautiful home accents.
Grab some girlfriends and make a craft day out of it. I know you will astonish yourself with all the different looks you can create.
Necessary Supplies:
- Balloon
Newspaper (or scrapbook paper)
Acrylic paint – 2 colors
Paint brush
Scissors
Sandpaper (optional)
Directions:
1. Blow up a balloon to the size you wish your bowl to be and cut up newspaper into small strips.
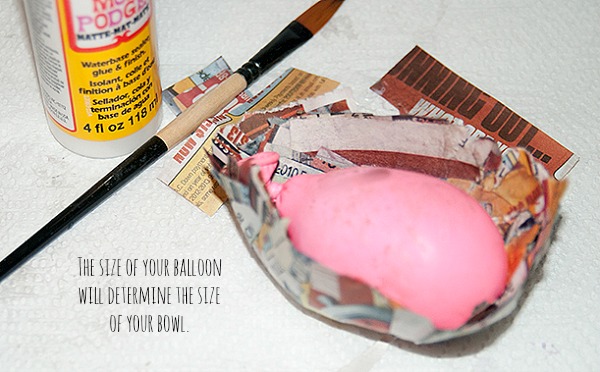
2. Use the modgepodge as glue to stick the newspaper to the balloon. Apply the modgepodge using a paintbrush, and continue adding newspaper until half the balloon is covered. After the first layer of newspaper, several additional layers of newspaper will be required to make a strong bowl, but allow time to dry between each layer. Depending how smooth you wish your bowl to be pay attention to push out any air bubbles or bumps from the newspaper. If you find you are getting too many bumps try using smaller pieces of paper.
3. Once the newspaper has full dried, pop the balloon and throw the remains of the balloon out.
4. If you wish you bowl to be extra smooth, you can use sandpaper to sand down additional bumps. Do this before you begin painting. For my bowl, I wanted something that was more of an organic shape with bumps and bends that would reflect light so I skipped this step. Also for the rim of the bowl, I liked the jagged edge, but if you want a clean edge just take your scissors and cut around the rim of the bowl to smooth things out.
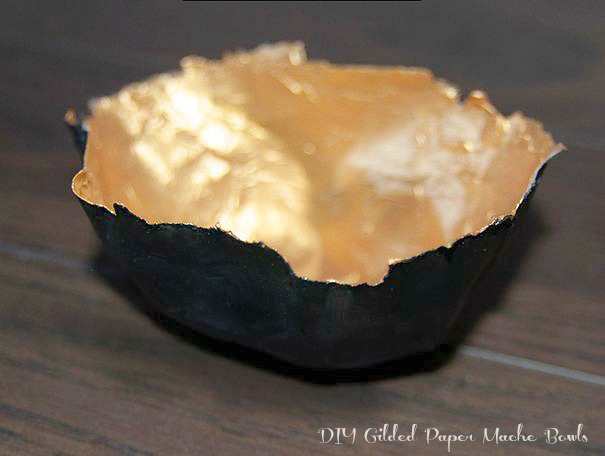
5. Next, clean your paintbrush of the modepodge and paint the inside of your bowl with your choice of color. I chose to paint mine with gold acrylic paint which is very shiny and looks like gold leaf without all the additional cost and hassle. For the inside of my bowl I painted two coats of gold acrylic paint.
6. Flipping the bowl upside down, I then painted the outside of the bowl with matte black acrylic paint. If your paint has any gloss in it, the gloss will highlight all the bumps in the bowl. Since I only wanted to highlight the inside of the bowl, I kept that glossy while the outside has a matte paint.
7. Depending on the newspaper you use, it is possible the ink might show through if you paint a light color and use poor quality paint. If this does happen, just paint an additional coat of paint.
8. Let dry and enjoy!
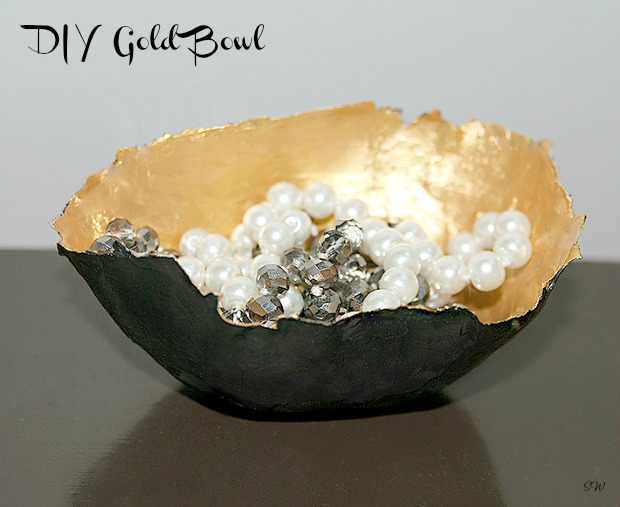
Isn’t it just beautiful? I love the modern twist of this bowl by having the jagged edges.
Here’s another option with a similar technique, but using this adorable patchwork fabric. Can you believe how the look is so different just by changing mediums and colors? This is just perfect for a cute spring or Easter basket!
I’ve had this project bookmarked for years. 🙂
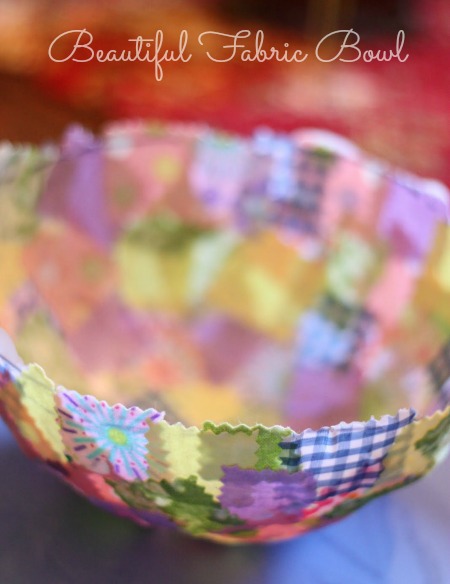
The directions are very similar, so you can put a fun twist on this, coordinate this to your home decor and use fabric covered bowls instead of paper mache. Head over to see I Can Teach My Children for her great directions on how she made her bowl.
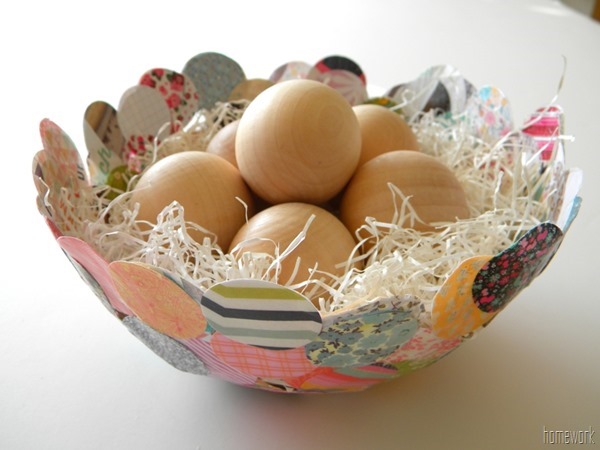
Here is another variation I found at Carolyn’s Homework. Isn’t that adorable? She cut her scraps into circles, but head over to see all her ideas because she puts a slight twist on our tutorial.
If you decide to tackle this very simple, yet fun project, please send me a picture. I’d love to add all the variations that you’ve created.
You are going to get me in a crafty mood. I like your bowl the best of the ones you showed. It actually looks like it could be expensive.
YAY! Join us in some crafting and honestly, coming from me that says a lot because typically I love DIY but am not always the best with crafts. I love that it’s easy to make them look GOOD!