There’s something so special about using our God given creativity to speak life into our home, yet when most hear the word “crafts,” they run the other way. It conjures up old memories of stick glue and markers gone awry, or for me, I instantly remember my delightful Mops craft mornings where my finished product looked more like my preschoolers went to town.
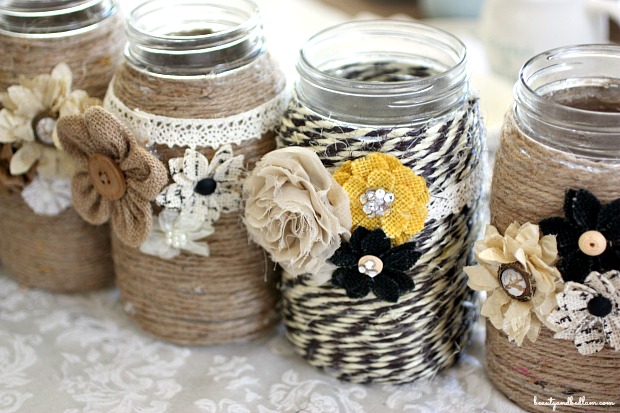
A few months ago, I gathered some of my girl friends for the ultimate crafting day. We had a blast and I’ll write more about that in another post because it’s such a wonderful community building time, but I want to highlight just how beautiful and easy our DIY Embellished Mason Jars came out.
This is a craft for ALL of you!!
Believe me when I assure you that it’s impossible to mess up and it’s completely possible to use items or glass jars that are already in your recyclable pile. Re-use, re-purpose, -re-create!
The longer we crafted together, the more our creative juices were unleashed and we just had a blast. (Scroll down to the bottom of the post for an entire video tutorial of our crafting time together, as well as why these adorable jars represent more than just a fun craft.)
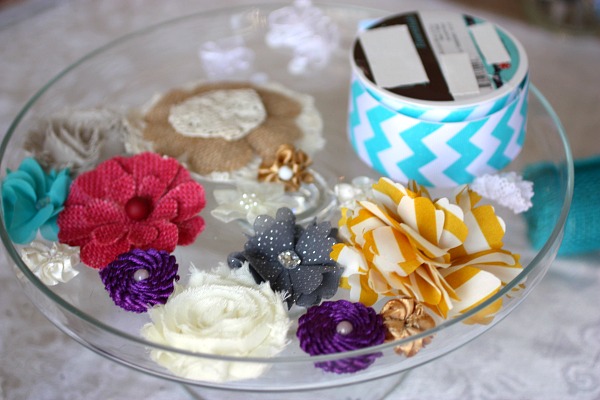
I purchased similar Twine Cord and embellishments at Hobby Lobby. I popped into most of the craft stores, but Hobby Lobby had the best assortment. Where ever you shop, make sure you grab their coupon or go online to find out what’s on sale.
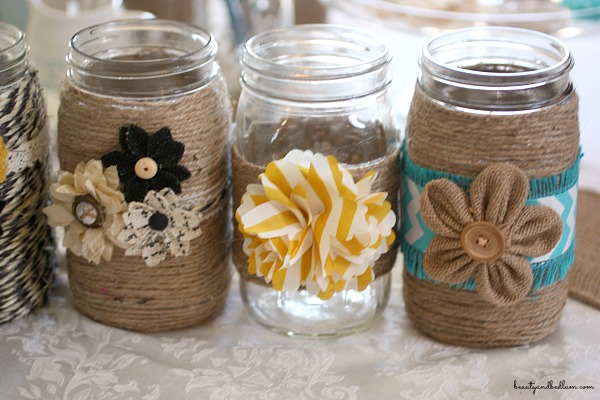
Believe it or not, most of the mason jars were ones that I bought at yard sales and Goodwill, but you may purchase them new very inexpensively. We used a few pickle and condiment jars as well, so this is truly an inexpensive way to add creative touches anywhere. My niece has already decided that when she gets married, her reception will definitely have similar mason jars holding some flowers.
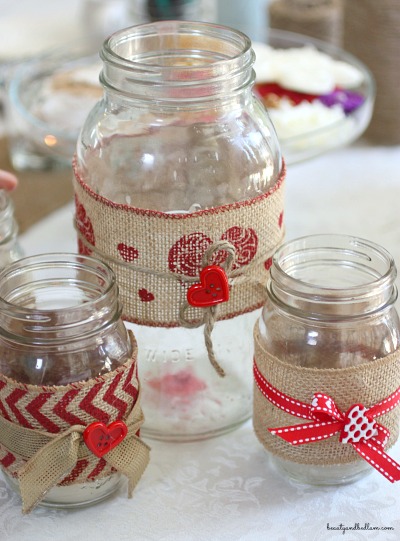
For any occasion or holiday, the colors and embellishments can easily be planned to match, just like the Valentine’s Day jars above. I know that red, white and blue touches would be the perfect Patriotic touch for this week.
If you are not a crafty person, make sure you don’t overthink this. It’s fool proof, I promise. I have everything laid out all cute because we were doing this as a video shoot for (in)courage, but trust me, it’s so easy and in 20 minutes you can have some adorable mason jar decor.
{The Basics}
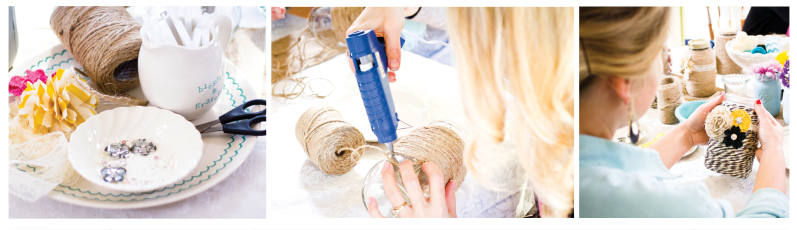
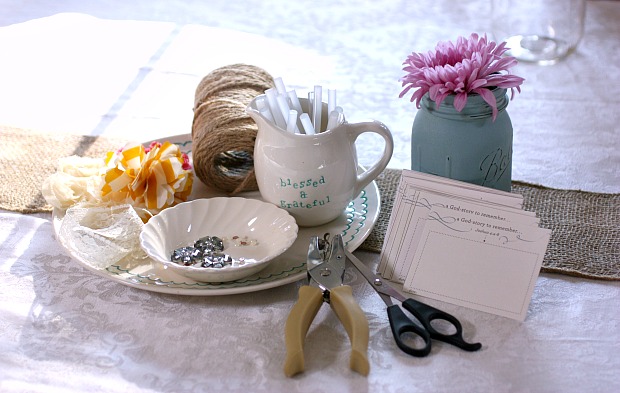
Supplies you’ll need:
• Mason Jar
• Roll of twine (you can use regular twine or switch it up colored/patterned twine)
• Hot glue guns (1 per two people) + additional hot glue sticks
(*NOTE: Make sure to use low temp hot glue guns. I learned the hard way and had some blisters to show from it.)
• Your choice of embellishments (you can’t go wrong here).
• Free Craft Printable
• Pens
• Scissors (1 to 2 pair should be plenty)
{The Steps}
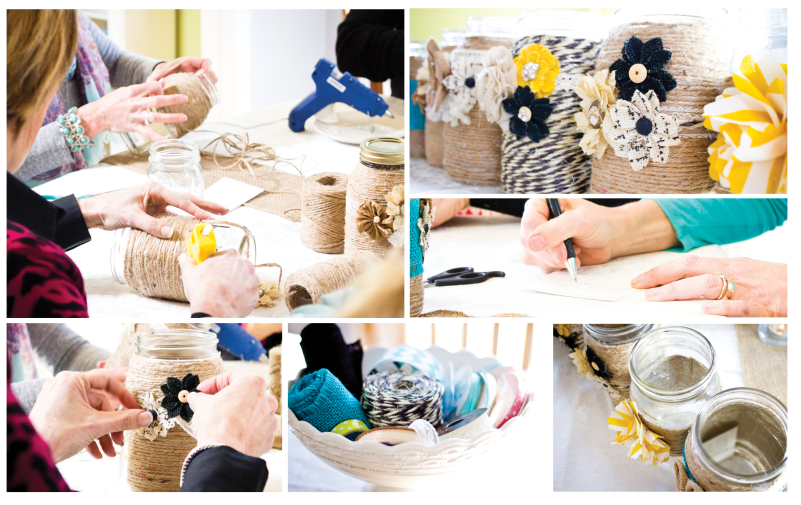
• Step 1 – Glue the first two rows all the way around the jar.
• Step 2 – Continue wrapping, pulling every row tight.
• Step 3 – Use glue every three or four rows.
• Step 4 – Glue every row as the base of the jar curves.
• Step 5 – Add buttons, ribbon, get creative!
• Step 6 – Write a God-story note to keep in your jar (Since we highlighted this for our (in)RL conference, we tied in a significant meaning to our craft. You can hear more of my story on the video.)
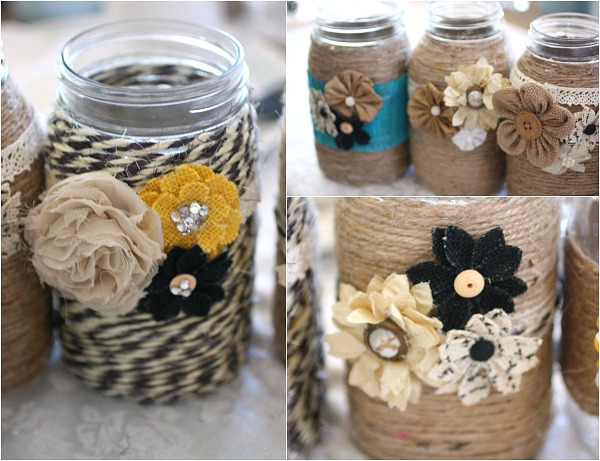
Aren’t they just amazing? Every single one turned out so very cute and we had the best time creating together. I can’t wait to do it again.
As you well know, I love decorating with mason jars. My 50 ways to use mason jars is still one of my favorite posts and I haven’t even added in these ideas yet.
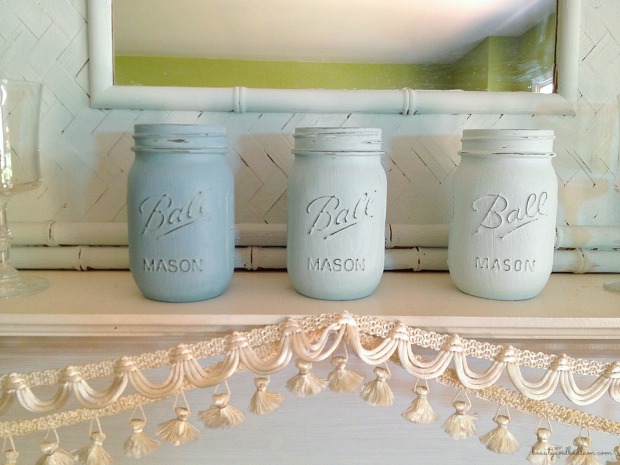
You can find me painting mason jars for all sorts of occasions, and I especially love these simple, distressed jars on my mantel. They make me continually happy paired with my painted yard sale mirror.
I’ll be going into more detail about organizing special community building days like a friends’ craft day, as well as my meal prep days with friends, but to give you a little head start, here’s a behind the scenes look at our vision behind these jars, as well as a hands on tutorial, perfect for you visual learners.
The incourage team put together a wonderful overview of the directions, so feel free to print them here.
And then when you’ve finished your jars, print off the notecards, so that you can share your own story throughout the year.
If you decide to make these, I would LOVE to see them and I can add them to the post for more creative inspiration; the highest form of flattery
I just love these beautiful jars. I saw them on Pintrest this morning and have already Pinned them : )
What fun to get to do them with a group of friends and family. That makes them even more special.
Thank you for sharing these wonderful ideas!
You are so welcome. It was so much more fun with friends. 🙂
Love the jars and your heart, Jen! Did you know I’m a PK (Pastors Kid)? Blessings, friend.
Kelly?? I did not know that. Can’t wait to see you next week at Haven. 🙂
Jen – You have such a beautiful blog! It was so wonderful to meet you and hang out with you at Haven. Such a blessing! You are truly a gem! Becky B.
Becky – spending time with you was a highlight! So wonderful to now have a good friend all the way in the famous Hollywood area 🙂
wow jen your mason jars looked beautiful.what a creative idea.iam going to make.thanks for the tutorial.what a great idea to do creative jars along with your friends.
Thank you for sharing your crafts you inspired me .
Great idea. Thank you so much for sharing. Now I can save more things. Thanks again.