I recently read that we see over 250 images everyday. 250 EVERY DAY! That’s a lot of images.
Between instagram, pinterest and facebook, I am willing to bet I see double that every day! If you are anything like me, you have lots of photos stored on your phone and computer, but rarely hold that image in your hand. That’s the one thing I miss about digital photography. I never print my pictures anymore.
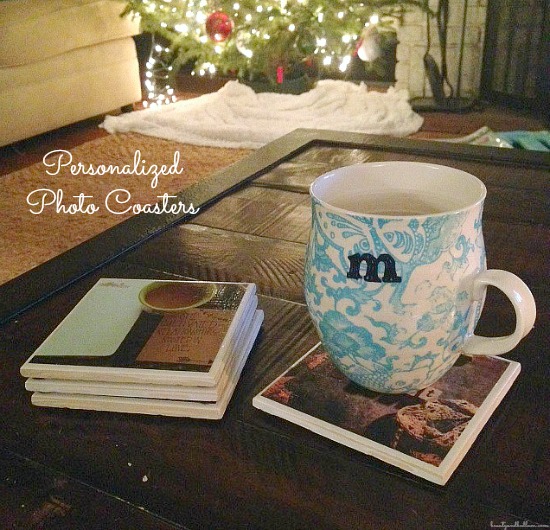
Here is such a fun project that will bring your photos to life. There’s nothing better than being able to see and hold some of your favorite photos everyday.
Yes, make your own personalized photo coasters! It doesn’t get better than that!
Supplies Needed:
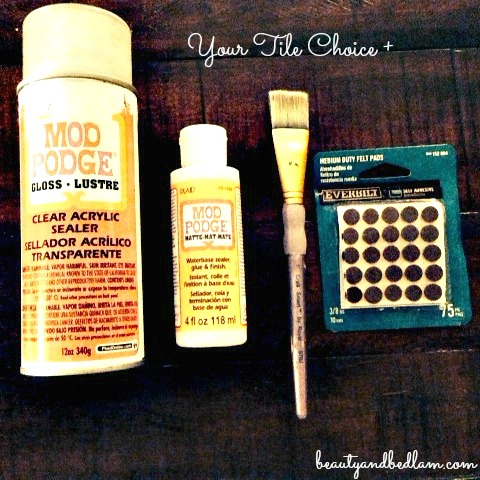
- Paint brush or Sponge paint brush found at Dollar Store
- Modge podge decoupage glue (matte or glossy)
- Modge podge clear acrylic sealer (or any clear acrylic sealer)
- Felt pads
- -AND finally, white tiles (SO FRUGAL!)
Directions:
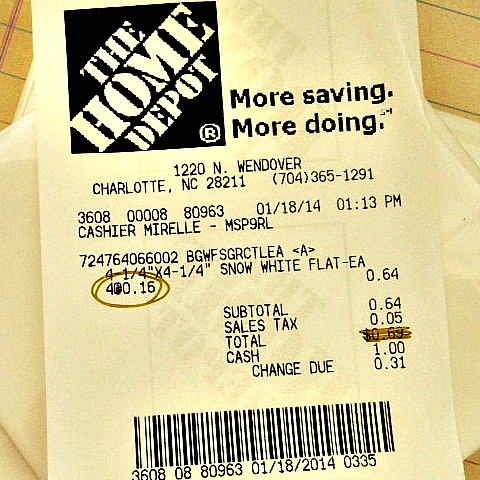
- Purchase tiles at Lowes or Home Depot.
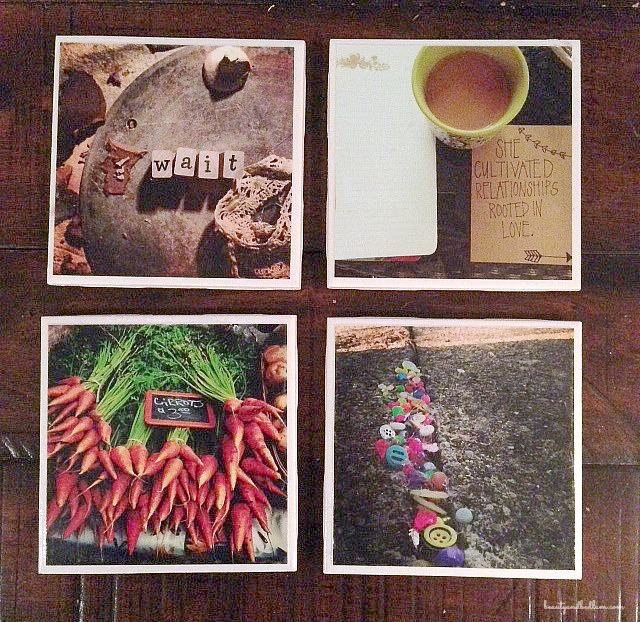
- Print photos to 4×4 size.
- If needed, trim the photo to fit your desired tile size.
- Using the paint brush, apply the decoupage glue to the back of the photo and affix to tile.
- Continue with the rest of your photos.
- After those have dried completely, apply decoupage glue over the top of entire picture/tile.
- Make sure you keep your strokes even because Modge Podge will dry with lines showing if not done smoothly.
- I waited 2 hours between each application and did a total of 3 layers of the glue because I wanted to be extra sure they were waterproof.
- After a night of drying, take the coasters outside and spray on the sealer. This is critical step because it seals the project and keeps from indents appearing when stacked.
- Wait 15 minutes and then do an additional layer. Do this three times.
- Let that sit and cure for at least 24 hours or more.
- Affix felt pads to the bottom to protect coffee table before gifting or displaying.
For those of you choosing pictures from your phone (which most will), check your local CVS or Walgreens for their photo apps. You can select your photos and have them sent directly to the store to be printed. So easy)
Can you even believe how simple, beautiful, functional and amazingly inexpensive these are?
These will make some amazing gift ideas. Just think how perfect they would be for shower and wedding gifts (use pictures of the couple), Mother and Father’s Day, birthdays and oh, grandparents would go crazy with pictures of their grand kids.
Yes, so many amazing opportunities to give this extra special, personalized gift.
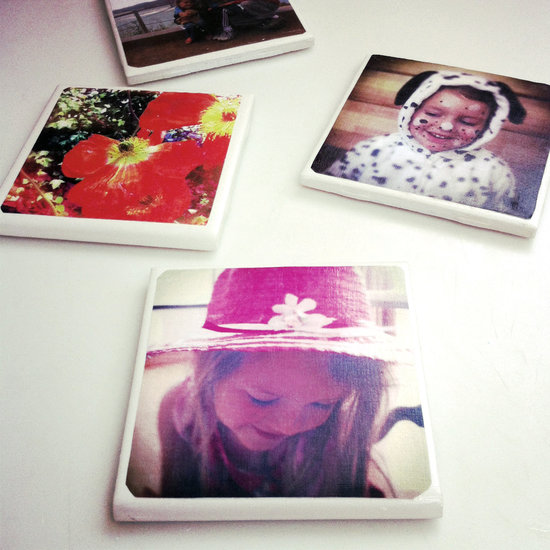
I love this more vintagey look of the kids from Pop Sugar.
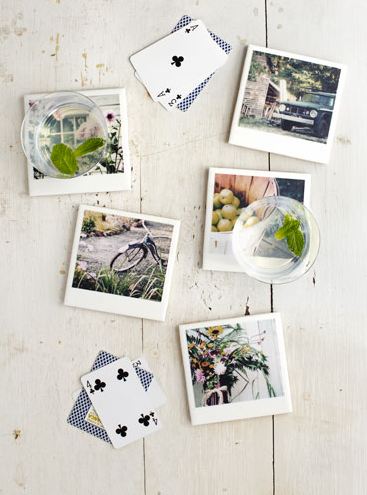
And these Polaroid inspired photo coasters from Country Living are a unique twist. Choose a slightly bigger tile size or just cut photo down, exposing additional tile at the bottom. Directions are identical.
Enjoy making this wonderfully easy, DIY Photo Coaster project.
There are so many options in how to make these and they are such fun to create.
Thank you so much to Megan, lover of all things handmade, a collector of beautiful paper, buttons, glitter and other pretty tiny shiny things, for sharing her super fun Photo Coasters with us!
Just wondering….did you use a laser or jet print printer? I’ve tried modgepodging over jet print photos and the colors start to smear because it is water based, I think. Would love to know if you ran into any problems. I’ve had success spraying a light coat of sealer on the photo first, them modgepodging onto canvas with no problem. They look great!
oh gosh, I love this idea! I think I’m going to have to save this idea for some of our homemade Christmas gifts this year.
Just imagine how excited new parents would enjoy 12 of them 1 picture for each month of a child’s first year
I love this idea so much and I’m trying it but no matter what I always get streaks on my coasters. I tried a softer brush. Any ideas on how I could get it smoother? Or is it just going to have some lines no matter what?
@Taylor wagersmith, I had pretty good luck with a cheap foam brush. They make fewer streaks than a bristle brush but I think you are still going to have a small amount of texture. Just try to go over each stroke once and don’t work the modge podge too much.
Hi,
must the photos be printed on a certain type of paper? Would this work on photo printed paper or regular paper?
best,
Amanda
photo paper is what we used. I think regular paper wouldn’t give it the clarity it needs.
Would it work with gloss paper?
I would definitely think so since you’re sealing it, but haven’t tried it to make sure.
@Jen, Thanks!
THANK YOU!!!!! I was looking for something unique and special for a friend of mine. This is perfect and I was able to make 4 darling coasters in just a few hours of shopping and gluing.
🙂
YAY! So thrilled to hear that. 🙂
Do the coasters withstand hot drinks?
Yes, they should if you seal them very well.
Fixing to make these for my step kiddos for Christmas. Such a great and cute DIY gift. Thanks so much for sharing this (over 6 years ago…LOL).