

A few weeks ago, I shared open shelving ideas and inspiration for kitchens, as well as a sneak peak at my own kitchen solution for open shelving. I encourage you to check out that post because it allowed me to brainstorm alternatives to create a look that I loved without having to grapple with budget constraints.
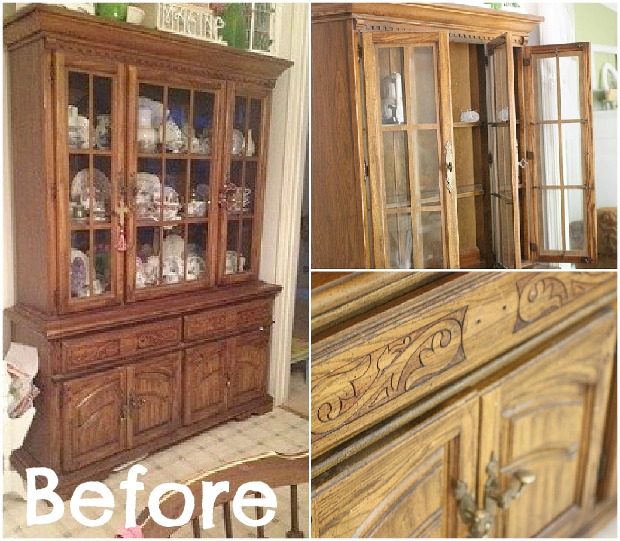
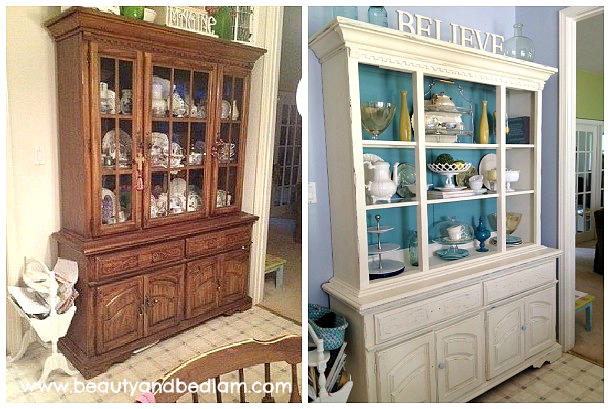
Take a look at my basic brown hutch. Most of us have these pieces in our home, and if you don’t, you can find them easily on Craig’s List for around $100 – 200 and much, much less at yard sales. In fact, my greatest yard sale find of all times was an antique hutch for $5 – don’t miss checking it out. Your jaw will drop.
Do you have something similar? You know those solid wood furniture items that we have loved for a long time, but that no longer fit our decor. Our tastes have changed over the years, and they may have become dated, so we want to change them, but are hesitant.
Here’s the problem.
We’re not quite sure what to do with them because the “wood lovers” in the family shame us into thinking we should never paint over beautiful wood pieces such as this hutch.
Don’t listen to them, and here’s why.
If you don’t love it, change it. Live ONLY with those things that you love.
Too often, I live with things in my home because they were a good deal, but honestly, I’d rather invest in a few items that I love or be willing to change the things I already own into something I love.
For years, I’ve wanted to change this hutch, but I kept procrastinating. Now that it’s finished, I could kick myself for taking so long because I just LOVE IT!! It only took a day and around $40 in paint and it was worth every penny.
I knew I wanted to go white to match my kitchen cabinets, but be certain because there are SO many hues of white. We went with Antique White by Annie Sloan. I love this white since it’s so versatile, but it really changed hues based on the room. It looked quite white in my foyer when painting it, but when we moved it into the kitchen, the surrounding area made it look much more off white with yellowish hues, so double and triple check since paint can look so different based on the room you have it.
The beauty with Annie Sloan chalk paint is that you have no sanding or priming to do. That made all the difference for me. There are some pieces I don’t mind sanding because it’s a simple process and I can go with less expensive paint, but for a huge project like this, it is worth the slight investment because I would still be procrastinating.
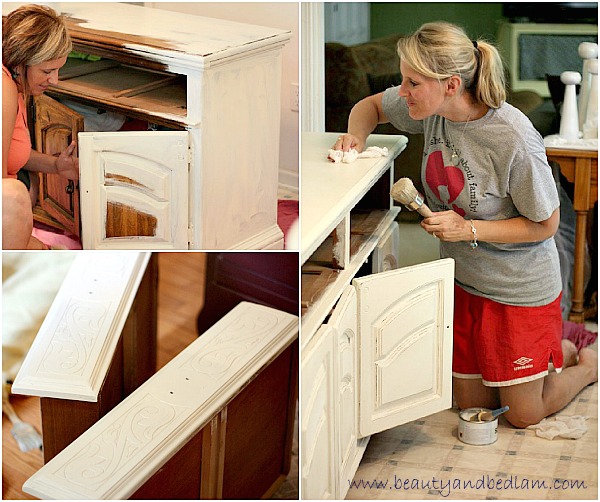
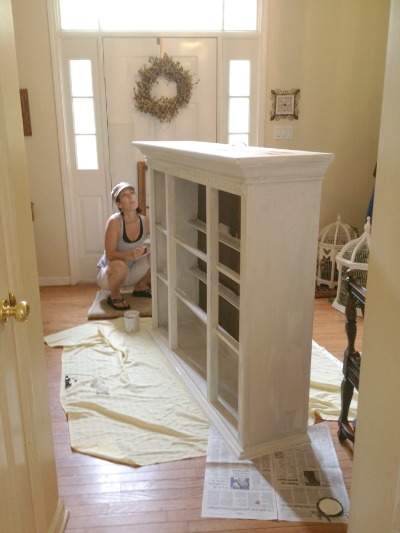
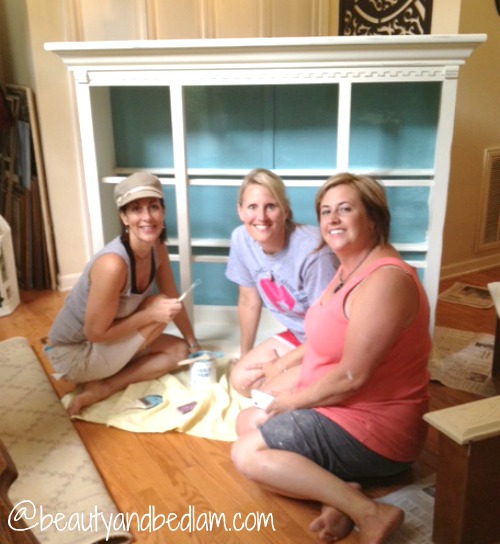
If you follow Balancing Beauty and Bedlam on facebook, then you saw this picture already. Someone was concerned that I was painting inside because of all the fumes, but another reason I love this stuff is there are no fumes. This piece is SO heavy and I have no garage or work area, so the freedom of painting right in my foyer was a dream.
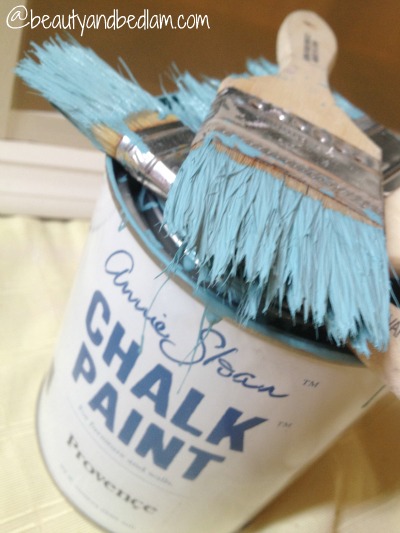 I decided to go with a pop of color in the background. I knew this would be the deciding factor that would set this piece apart and it truly did. This color is Provence and it’s gorgeous, isn’t it?
MJ and Trish are my sweet friends who came and helped me get this done in a few hours. They are the genius painting dream team behind the blog, Huelogy, and also share their Annie Sloan Chalk Paint expertise through painting workshops at the beautiful Interior Design Store, Total Bliss.
It’s wonderful having talented friends because I’ve asked MJ to lead our furniture painting workshop at my Becoming Conference (there are still some tickets left) and she’s going to be amazing. She is SO knowledgeable on all things painting. She’s also doing the optional, hands on painting workshop where you can actually bring a piece of furniture and they will go really in-depth on how to turn your old furniture or thrift store finds into masterpieces with Annie Sloan Chalk Paint.
It took about two coats of the Antique White Chalk Paint to achieve the look we wanted, which was right around a quart. I barely needed any of the Provence, so I’ve been having fun with other paint projects since then because there was so much left over
Can I have too many blue pieces of furniture? (Well, yes, probably. ;))
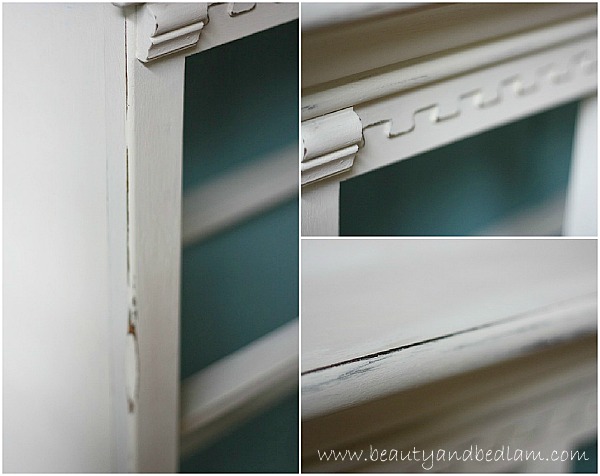
After we painted, we used sandpaper to give it the distressed look that I was desiring.
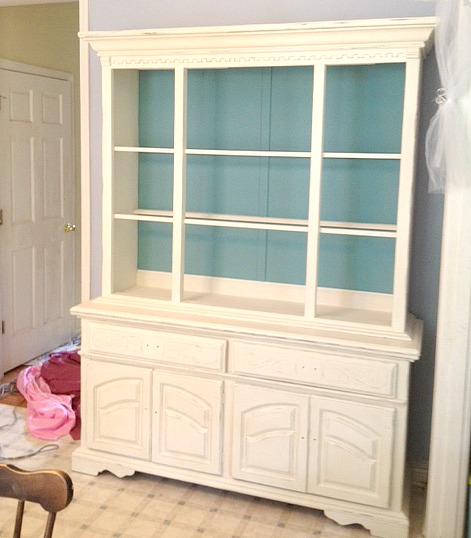 It’s nearly impossible to capture how it really looks on camera, but the effect is gorgeous. After the distressing, we waxed the areas that would get the most hand traffic to really seal it in. I didn’t bother with waxing the blue, since I should be the only one touching that area. 🙂
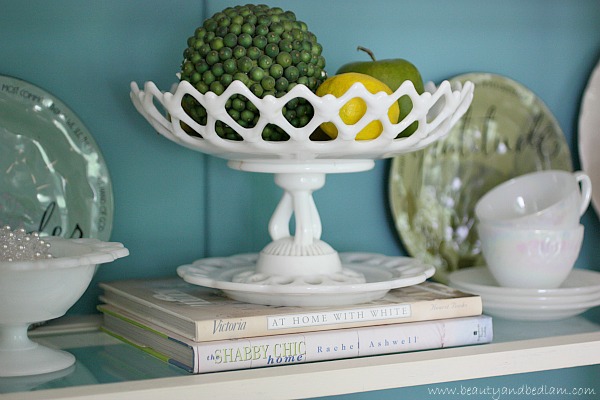
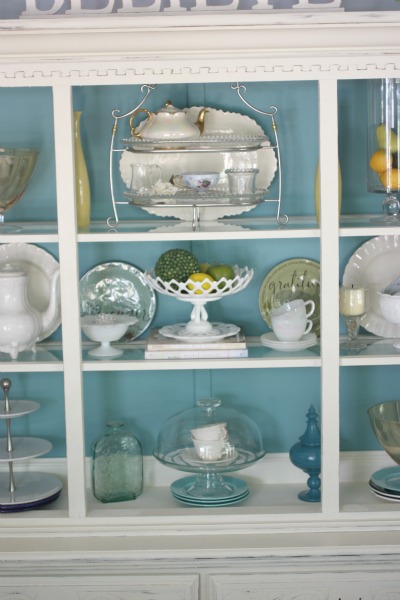
Then I went to town styling the shelves.
This is where it pays to be the Trash to Treasure guru because EVERYTHING on the shelves are second hand for literally pennies on the dollar. I snag milk glass where ever I see it and typically pay about $1 for something like a vase. These books at $0.50 were perfect to give a bit of the extra height that I needed. Even the fake fruit was thrifted. (Oops, I take back the “everything”. I’ve been playing around by taking things off, and putting on new things, so these two plates – Gratitude and Wonder – are from Dayspring. :))
It’s still unbelievable to me what a little bit of paint and your imagination can do.
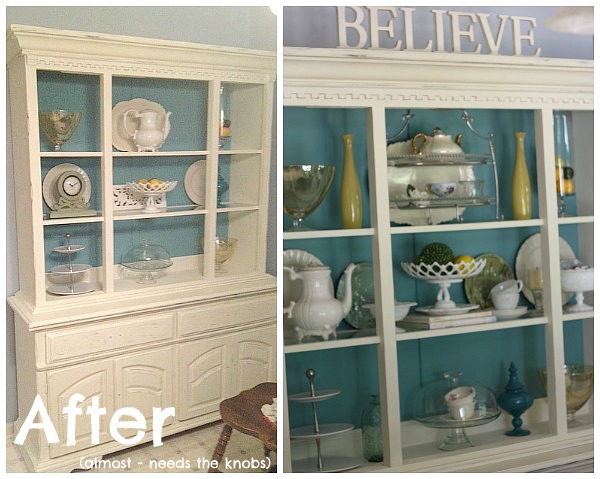 This “After” picture was taken the first day I painted, so, it wasn’t quite finished. I’m still searching for just the right knobs.

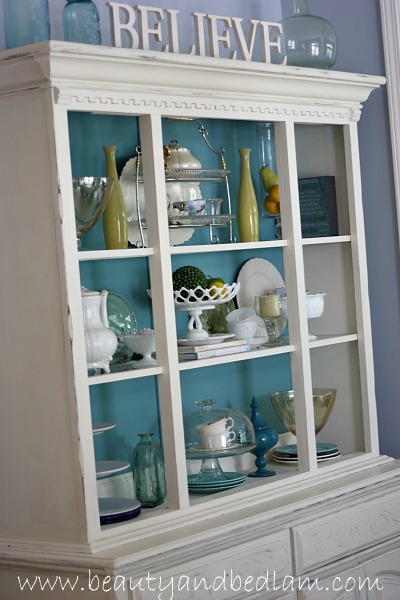
I bought a few wooden knobs and have painted them blue to hold me over until I find the ones I want.
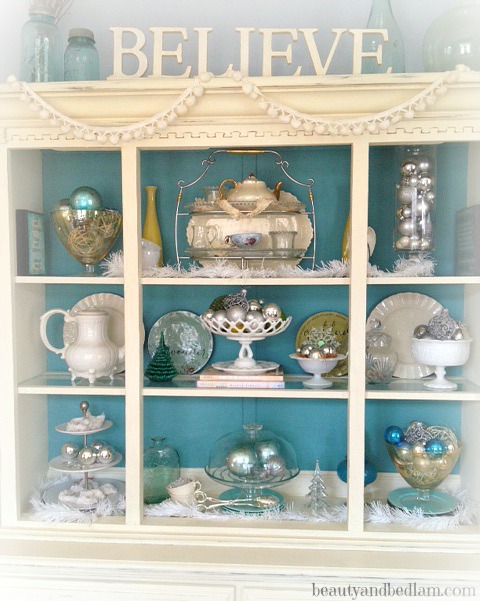
Here it is all styled for Christmas. Go check out that simple transformation that I just adore.
But right now, I am so happy with it, that I don’t even mind having temporary knobs.
This is my view right now. I have my computer at our kitchen table and when I look up, this is exactly what I see. It just makes me happy. I was going to have this hutch store more of my practical items. I have blue and white dishes that are stuffed into our kitchen cabinets. (You can see the dessert plates under the cake plate straight ahead.) I will continue to play around with what I want, and utilize it to the best of my ability.
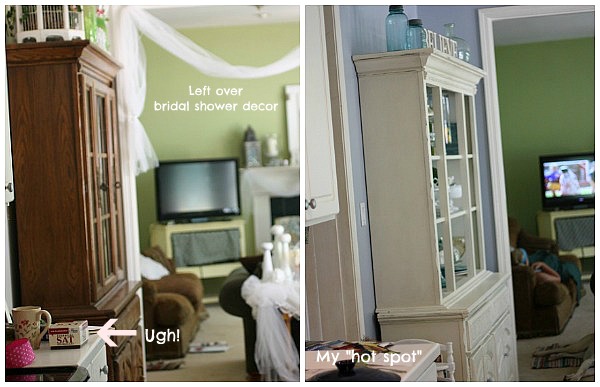 This gives you a better shot of where the hutch is located. We have an open concept on our first floor, so our kitchen opens right into our family room and this hutch is right where the two rooms separate. Now I see white instead of brown and love it.
I have two more wood pieces that are in line to be painted. I am waiting until I paint over my green great room to determine the colors I want, so now I need to stop procrastinating on that paint color. I’ve had the swatches painted in a corner on the wall for about four months.
I hope that my DIY Hutch Redo has inspired you to step out of your comfort zone, and let your creative juices flow.
You can do it!!
It’s so worth it to revitalize the items that you already own or give new life to something thrifted.

Do you have a piece that you want to redo? What is it? I’ll cheer you all the way to the paint store. 🙂


WOW!!! Amazing!
that is pure awesomeness! i’m feeling so inspired now. i guess i’m going to have to go looking for some old furniture. ;o)
It looks great! Hobby Lobby has a lot of neat knobs and they are cheap! I have a hard time walking past that isle without wanting to buy a collection of them! 🙂
Great job! It is hard to tell it is even the same piece of furniture. I am going to have to try that paint next time I paint furniture because it looks so easy to use. And I love the colors you used.
Yes Jessica Cox – that is exactly where I plan to go. It’s just 30 miles from my house, so I need to get over there but I know I will find something I love. 🙂
Wow Jen, that looks amazing! Love it!
You’ve inspired me!!! I have an ugly old dresser that functions as a buffet in our dining room. I just MIGHT have the nerve now to refinish/paint it. It’s so functional, which is why I’ve kept it around. . . but oh-so-ugly. Paint would do wonders for it.
Thanks for showing this! It’s beautiful!
Fabbbbulous! 🙂
This looks awesome, Jen! I love the pop of blue against that gorgeous white.
I just wanted to say how lovely this looks and what a great job you did. Thanks for sharing.
Very lovely Jen – I am in a home full of wood lovers, so I am super inspired by this post to just ‘go for it’. Sadly our local Annie Sloan paint retailer discontinued that paint line and is bringing in CeCe Caldwell’s chalk paint in a month or so. Hopefully I’ll get to give it a try soon! By the way, have you tried the wax on the other Provence blue pieces you’ve painted? I understand it really deepens and enriches the color!
This looks so awesome. It always amazes me how much just a coat of paint can transform something. I love that pop of blue. It gives it such a unique and eye-catching effect. Thanks for sharing. You’ve inspired me to go searching for a used piece of furniture at a thrift store or yard sale just so I can it fix up 😉
It’s beautiful, absolutely beautiful, Jen! It has been transformed from old country theme to cottage-y theme (and I LOVE the cottage look). I did a wee little project painting a small wooden end table all white with semi gloss paint and like it much much better, but haven’t found a BIG project, though I think our dining room could really use a hutch (it’s the most spare room in the house with some empty wall space that could stand to hold some pretty dishes). I’m going to start keeping my eyes open for such a piece of furniture:)
This project turned out so well. What a beautiful hutch…that would make me smile every time I walked by. 🙂
ohmygoodness!
it looks incredible! way to go. love it.
Looks great! I’ve been working on some Annie Sloan projests as well….fun!
Thanks for allowing us to come be a part of the AWSOME transformation! I know MJ will do a great job speaking!!! Hope to see you soon… And btw, you have the most well behaved and sweet children in the world (almost makes me want to homeschool ::snicker::)!!!
I was SO sad to find out you weren’t coming. MJ just mentioned it and said, “You know Trish can’t come, right?” UGH – NO, I didn’t. So sad but I understand. 🙂 You guys were awesome, and thanks again.
I love the pop of blue inside, beautiful work!!!
Great post Jen! What a fabulous transformation!
WOW Jen! I LOVE it!! I have a few pieces right now that I would LOVE to pain, but my hubby wont let me 🙁 he’s the one who has a hard time letting go lol
I am on the hunt for a nice hutch like that so I can paint, and get my fix!
beautiful, try anthropologie for knobs in store or online
What a transformation, I’m beyond impressed!
That looks wonderful!
Love this! I’m all for painting rather than throwing and buying new.
It looks great! It is amazing how white paint really lightens up a space! I remember your $5 hutch from long ago! You are the queen of deals! I have heard of this chalk paint but I think you sold me on the ease of no prep work! Will have to give it a try! 🙂
Wow it turned out absolutely beautiful!
Crystal knobs! 🙂
Oh I just love this – beautiful! And I have one that’s so similar, plus a matching sideboard… So my question is, would you walk me through what to do to seal/protect the piece? I painted an old dark wood entertainment center white a while back and some areas did get scratched up over time. You said you waxed some areas – what exactly did you use, and does it need to be reapplied periodically? Would some kind of sealer be better for an area like the top of the sideboard (which gets a LOT of traffic)…? Thanks for any thoughts!
I used wax on all the areas where fingers/hands go and I haven’t had any problems. I used Annie Sloan Clear wax (use dark wax if you want a more aged look), but you could use Briwax or Johnson’s Clear Wax too. Ask at HD or Lowe’s. The wax serves as a sealer, but you could ask at the store if you want something stronger.
Wow, just wow! That wasn’t my initial reaction but the initial reaction contained a bad word! This is awesome stuff! I have an old dresser that I wish to refinish and this looks like the right way to go!
Love the hutch!
Nice! I have a similar hutch. Question- without the doors are you having to dust all the time?
Not nearly as much as I thought. I think since it’s still covered,it keeps a lot of the dust away. I’d say once a week (at the most). I have gone much more than that and it’s not noticeable.
I have nearly the same hutch that I’ve wanted to paint for so long, but am worried about the gloss finish on the existing wood. I have never heard of Annie Sloan products (I’ll have to find out where to get them) and am wondering what tips you might have. Did you truly just paint over the glossy wood? Does the paint really adhear? Does the wax keep the paint from being scratched off? I’m such a worrier!
Those are great questions – dont’ worry, I’d be a worrier too thinking of tackling a project without looking into it. Yes, chalk paint (both Annie Sloan and Maison Blanche can be used without deglossing. It truly wonderful and one of the main reasons I invested in that paint because I did NOT want to tackle deglossing and sanding. You can find out where your closest retailer is with either of those brands and they can walk you through the process in real life. Yes, the wax keeps it from scratching and mine is still amazing with a TON of use.
I have an ugly hutch similar we inherited with our house. I have been begging my hubby to remove it from the house we purchased 6 years ago! Now I am going to paint it faster than he has removed it 🙂 I am so excited to get started and remove the doors.
YAY! Race to paint that beauty! You will LOVE it. Mine is definitely my favorite piece in the house. It just makes me happy.
Wow! I love it! Could I use this type of paint on my kitchen cabinets? I have been putting that project off due to all the steps required……
Thanks!
Yes, absolutely! Lots of people have done their cabinets with this. It obviously requires a lot of time and patience, but SO MUCH easier than the traditional way and so much cheaper than buying new ones. I think that there are lots of tutorials on painting kitchen cabinets if you google and add “chalk paint” Learn from people who made mistakes and then from ones with great success 🙂
Thank you!!
Looks absolutely fantastic. I have an 80’s Scandanavian Hutch and I’m going to do the same so thank you very much. You’re a treasure .😀
YAY! I’d love to see a picture when you are done. It’s been a few years since I painted it and it is still my most favorite piece in the house. I don’t regret it one bit. 🙂
I loved the way your china cabinet turned out. I am also in the process of re-doing a wooden china cabinet with Annie Sloan white paint. The only part of the process that I feel is daunting and that I am not sure how to tackle is the top piece of the two piece china cabinet. My piece is very similar to yours in that it has glass shelves that sit on wooden frames and I also have the wood frame where doors used to be. How did you go about tackling painting the shelf rails and the inside so nicely? I am concerned that I won’t be able to achieve a polished/finished look because of having to maneuver around weird angles and tight spaces to get the inside completely finished. Thanks in advance for any advice or tips you’re able to give
I think you’ll be just fine. Inside it’s not quite as important because you do have the knick knacks sitting in front of the inside. Send me a pic when you’re done. I bet it will be beautiful. 🙂
This is beautiful and simply beyond words the transformation. I have an almost identical piece that hubs and I are contemplating painting. You have definitely given me the inspiration. I would have NEVER thought of the blue inside or to use chalk paint. Thank you so much for posting and stepping out of your comfort zone for others’ benefit.
I’m so glad. You should definitely do it. It’s been a few years now since I painted it and it’s still my favorite piece. Makes me happy every time I see it.
LOVE, LOVE, LOVE IT!!!! Thanks so much for sharing your creativity and process.