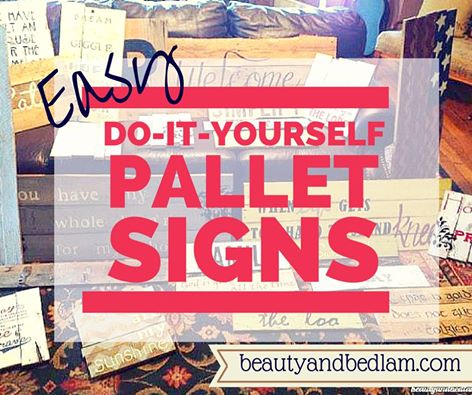
If you stroll through any craft or home decor store lately, I know you’ve eyed the beautiful typography and wood signs that line the aisles. I just love them and have picked up quite a few myself over the years, but what if you want something truly personalized?
Creating your own one of a kind, do it yourself sign is so much easier than you think and the learning curve process might just be the creative outlet you grow to love.
I stopped at my husband’s office the other day and saw their dumpster. My heart fluttered widely. It was filled with wood pallets and I gasped, “What do they do with those? Can I have some?”
I think he was tentative to answer because his mind was filled with all the projects that also made my heart pitter patter that are still waiting patiently to be completed.
“Yes.”
That was all I needed to hear. Free. Wood. Pallets.

My mind raced to this easy tutorial that a sweet reader sent me, and after seeing all her gorgeous painted signs, I knew you would love doing it too.
Often, we just make projects harder than they really are and we assume we need beautiful freestyle hand writing. NOT AT ALL! We just need to try (with the help of great computer fonts, of course.) It might take a few attempts to get it to where you love it, but since we got the wood for free, this is an inexpensive way to learn.
So many of my friends have started their own businesses selling reclaimed pallet wood signs, and I am SO excited for them. Granted, their signs are MUCH nicer than my attempts, but Jamie, from Mom School , shared how she makes hers if we want to give it a try. She now has her own business. (Check out more of her beautiful creations at her Sweet Southern Salvage facebook page.) Yay for mom entrepreneurs!!
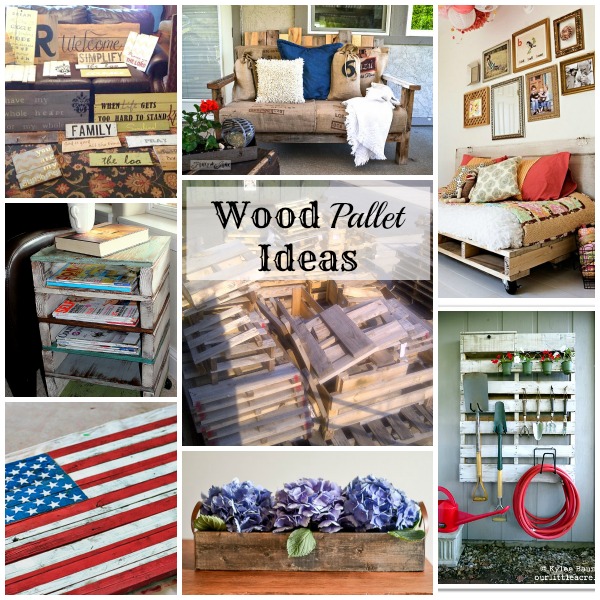
If you want to be even more inspired, check out all the DIY Wood Pallet Projects that I’ve showcased!! I just can’t get over how creative they all are.
I love having words of truth hanging throughout throughout our home and this easy tutorial is the perfect way to personalize it.


Do It Yourself Pallet Wood Sign (or any piece of wood :))
List of Necessary Supplies:
1. deconstructed pallet
2. sand paper
3. carbon paper
4. acrylic paint
5. paint brush
6. ball point pen
7. computer/printer1. Once pallet is cleaned and sanded, paint or “wash” (mix paint and water equal parts) your sign in color of your choice.
2. While drying, go to computer and type out the word or quote that you desire to put on the wood
and then print it in the font of choice (*see note below.)
3. For lighter colored boards, take that printed sheet and put carbon paper between it and the
board. Use a ball point pen to trace around the outside of the letters on the printed paper and this transfers a perfect “stencil” for painting. On very dark paints, the carbon won’t show. In those times, I don’t use carbon paper, but I will color with white chalk on the back of my computer paper print out (color the inverted letters), and then place that down on my board and lightly trace over. It will copy/transfer a white chalk line on your board. Works perfect for the dark colors.
4. Paint the outlined letters on the board.
5. Put hanger of your choice on the board and Enjoy!!* A sweet reader just left a wonderful suggestion that will help save on printer ink.
“In most word processing programs, you can make the font a “stencil” where just the letters are outlined, rather than entire filled in letters. This saves a ton of ink for your printer! Once you’ve created your text, highlight it (control/A in Word), then open up your “font” menu – in Word 2007 & up, there’s a little teeny arrow at the bottom right corner of the font area when you’re on your “home” tab. When the font menu opens up, look for the “effects” section. Check the box that’s marked “outline” & it makes it a stencil. You can also make it bold, which gives it a heavier line.”
Using the idea of carbon paper is such an easy alternative. I love that tip. You can buy Pattern Transfer Paper for Wood on Amazon or pick it up at any Hobby Lobby or Michael’s craft store.
There are sign inspirations everywhere. Stroll through your favorite stores and just look around. You can believe that my next signs will have pops of turquoise, yellow and green. 🙂

My sweet friend, Angie from Country Chic Cottage, shared how she did a dry brush technique. She put down her vinyl letters and painted over it, and then removed the letters to have the wood show through. I love that option.

See what I mean about inspiration every where? This is such a perfect display for all of our patriotic holidays.
This is a bit more time consuming, but how gorgeous. Head over to see this DIY Reclaimed Wood American Flag from Lilbluebook.

Personalized Pallet Sign for outdoor space from DIY playbook

See the detailed directions for this gorgeous sign using Vinyl Lettering at The Thinking Closet
Aren’t these just beautiful? Are you excited to give it a try?
What other creative uses are there for all these pallets?
I’d love to have you help me brainstorm.
For future use:
Also, remember in most word processing programs, you can make the font a “stencil” where just the letters are outlined, rather than entire filled in letters. This saves a ton of ink for your printer!
@Elaine Pool, Oddly enough, I don’t know how to do that; can you share how? I would love to save the ink, but my only “stencil” font is heavy ink… Is that a font, or a setting, or what exactly..? Great tip; thanks !
Ok, my sweet Elaine. Can you let me know the directions on that so I can save them ink? Is it just a setting?
@Jen, It’s really easy! Once you’ve created your text, highlight it (control/A in Word), then open up your “font” menu – in Word 2007 & up, there’s a little teeny arrow at the bottom right corner of the font area when you’re on your “home” tab. When the font menu opens up, look for the “effects” section. Check the box that’s marked “outline” & it makes it a stencil. You can also make it bold, which gives it a heavier line.
If you can’t figure it out, I’ll email you some screen shots so you can see what it looks like.
@Elaine Pool, Thanks so much ! The instructions were great and it worked beautifully. (OK, I’ll be honest… First I clicked on “no fill” but forgot to click “outline,” so my text just… quietly disappeared. But that was easy to fix! : ) Love this tip for many uses!
@Elaine Pool,
I know this post is older but I wanted to ask, how do I know what font size to use in reference to the size of wood? Size 72 etc means what in actual size once printed?
Thank you!!
Thanks so much for featuring my “love story” pallet sign. It’s still one of the most treasured pieces I own because I got to work on it with my hubby. You’ve collected some really inspirational pieces in this mix. Off to go check them out!
Warmly,
Lauren
The Thinking Closet
It’s just gorgeous. I meant to send you an email to make sure that was ok, so I hope it is.I just loved your post. 🙂
My husband and I made a patio table out of a pallet. We are also in the process of making night stands.
Melissa – I am in the process of doing a post on lots of unique ideas on how to use pallets. My husband’s office has unlimited supply and I would love to use them. Would you mind sharing how you did it or sending me a few pictures to include of both your table and night stand? I’d LOVE to have my readers see your creative project.
I love all things pallet! Pinned it!
Love these signs! I need to try this out one of these days 🙂
I love these signs. I actually have several pallets just waiting to be taken apart and painted. We did use some pallets to build a garden shed and a little “trailer” for our riding mower. They’re not really cute but they are functional, http://www.schneiderpeeps.com/2013/06/pallet-projects.html
I did this once with a baseboard and I cut out all the outlined letters (yes, that ‘outline’ option is fabulous!) and traced them onto the board. Took. For. Ever. 🙂 I LOVE the idea of carbon paper or the chalk on the back–will definitely be doing one of those next time! Thanks!
I love the idea of making my own piece of art, however, my font size maxes out at 72 which is definitely not big enough. how do you get the font so large?
@Lisa, when you click on the font size, a drop-down part appears, with a number in the box. You are not limited to the numbers available in the drop-down part! I’ve gone as high as 500 before, for signs or whatever. You type the number you want in the box, and hit enter. Try that & see if it works.
Thanks so much for featuring our Pallet sign!
xoxo, Casey & Bridget from DIY Playbook
Hi there,
I love this! What sort of businesses receive shippings in pallets like these? I would like to get some of these supplies from local businesses who are getting rid of it anyway.
Thank you!
You could try any kind of warehouse in your area or just ask a few industries and they could recommend.
Thanks for featuring our outdoor pallet sign! Xo, the Rookies @ DIY Playbook
You are so welcome. I hope that was ok. Typically, I always email first for permission and realized I took the liberty of doing it without so, but hope it brought you some traffic. 🙂
Great information! Can’t wait to try it.
For those taking the vinyl lettering route… if you have access to a Cricuit, you can easily and quickly cut your vinyl with it.
Absolutely – a Cricuit would be wonderful for this project! 🙂
I made a sign of a home out of wood!
That sounds really neat and quite intricate. Thanks for sharing.
I am so glad you posted this, I have some pallets in our yard waiting to be taken apart!
So glad you found it then. They are just such a fun thing to repurpose. I’d love to see what you do with them when you are finished. 🙂
Hello! I love making pallet signs. I just made my first one that will be outdoors though, and I am wondering what I should do to treat it, or protect it from rain and such? Any tips? Thank you!
You definitely need to use a weather resistant product. Check at home depot or lowes for a poly that will work. You can ask one of the employees in the paint department and they can help.
What great ideas and useful information! I never thought to use carbon paper to transfer letters onto the wood. I cannot wait to try some of your techniques and make my own sign! I have been wanting to make my own sign for quite some time and now I think I am ready to try it. I think I might even have a few wood pallets that I could use too! Thanks for posting!
Tanya – so glad it was helpful. I can’t wait to see your finished result. 🙂
Please do be careful with pallets. They are often used in chemical plants or other noxious places. Be aware that they may not be clean, and always ere on the side of caution. Other than that, beautiful designs, and wonderful ideas.
What type of paint do you use to write letters that doesn’t bleed on the pallet wood? Do you use some type of sealer before writing on them if using the natural color of the wood? Thanks for your help!
Thanks for the step by step instructions! Where did you find your deconstructed pallets? I’d love to make a few signs like this to put up around my shop. I feel like having good signs and displays is half the battle when you’re trying to sell a product. If you have good signs and your product is well displayed, customers are more likely to be drawn to it, you know?
Adorable blog, by the way.
Brook
Thank you for these instructions. I had no idea about just printing the outline of letters until I read about it here. I tried it and it worked like a charm. I, also, love inspirational words around my house. I might just go a little overboard with this. Thanks again.
Oh wow. Thank you I was wanting to do a board and brush project but not spend the $60!
I love these, especially the gardening display and little magazine shelf! I, too, love seeing wood signs around craft stores, but I hadn’t known that you could make them from wood pallets. I always thought that wood pallets were for construction sites or store displays, but I might have to try to snag some to make some signs or displays. Thanks for the ideas; I’m saving this for later!
Can you show a way to disassemble them easier anyone out there. I have so many pallets just can’t figure out how to take them apart. I just picked up like 8 old doors I’m fixing to antique out and just started making the wreaths. What is a good way to start salting them I don’t have a Facebook personal reasons
I love love love this post! Thank you! We have a lot of pallets around here.
I wish you didn’t have so many ads on all of your images. Very sad about that. :((((((
hi Andrea – can you let me know what ad images you saw? Since I don’t run my ads and they don’t show up on my end, Id love to know since I have requested that they don’t have those annoying pop ups etc. Are ads going across the images? Also, are you on mobile or PC? Thanks for helping me get to the bottom of this.
I love the look of these DIY wood signs. One of my best friends is getting married soon and I wanted to create something for her and her soon-to-be hubby. She loves inspirational quotes so that making a cute little sign for them to hang somewhere in their new place would be nice. As a beginner, I think it would be a good idea to start simple so that I don’t overwhelm myself.
These are so cool! Really love the American flag one. Now I just need to find somewhere I can source old pallets…
i’m really love with your american flag and DIY written quotes on wood. i will also try these. your ideas are super cool and interesting. thanks for giving us such inspirations. i’m grateful for sharing the post and keep on sharing more interesting stuff.