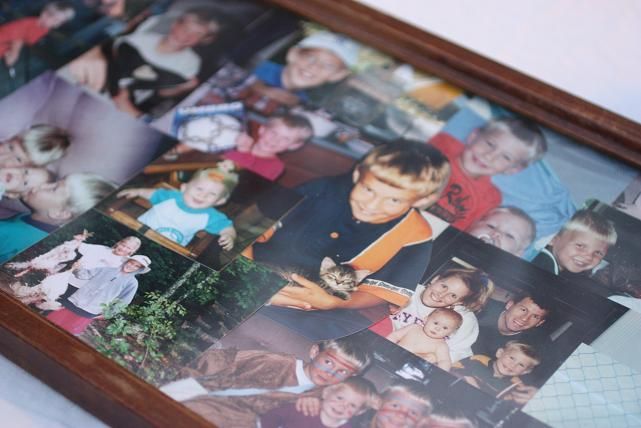
Honoring our eldest son in a quick and creative pictorial way came in the form of a $1 yard sale find. This tray looked like trash, which was probably why it was still around at 11 am on a Saturday morning, but I had a vision for the treasure it could become.

Often it just takes a creative brainstorm to rethink, repurpose and reuse otherwise seemingly ugly objects. Scrapbooking is a thing of the past since I started my blog, so grabbing old pictures and taping them to the inside of the tray was such a wonderful way to reminisce. It only took about ten minutes to grab the pictures and arrange them. I didn’t even cut them to fit. I just placed and overlapped them on the glass.

When I originally purchased the tray, I was going to spray paint it right away, but thinking of the array of autumn leaves about to paint our treeline with oranges, yellows and reds, I am keeping it brown for a month to showcase the beautiful leaves. I can’t wait to create a festive fall accent piece.
For Christmas, I will definitely be spray painting the tray and having fun inserting fabrics and scrapbook paper. The pine tree and Christmas tree scenes were pieces of scrapbook paper, while the polka dot piece is one of my scarves. Think what a great accent that would be for my kitchen if I painted the tray turquoise – that is very tempting.
You may not have an old glass tray, but you could create the same effect with large glass picture frames. The best part of this whole $1 adventure was that it took me an astronomical ten whole minutes to create all the looks above.
So, go dig out those old frames and let your creative juices fly. I know your coffee table is calling out for new life. 🙂
Another use for yardsale picture frames is they make great dry erase boards.
Great post!
Great idea… love it.
Over the weekend, I took an old black picture frame and put a small burlap coffee bag from Jamaica in it. I love that bag and memento of awesome coffee and an even better vacation.
I don’t have a coffee table b/c we re-purposed it as our t.v. stand in our small, small apartment.
Ooo, I like the scarf and pretty papers in it!
What a great idea, but then you always have great ideas and that is why I have to stop in for a little visit to your blog everyday….As always, I thank you for inspiring me….
Now those photos are the way I remember your kids. Especially the one in the lower right hand corner with the kids in costumes. It has been a loooooong time!!!! Great little idea BTW.
Great ideas. Thanks for sharing.
EWW! Nice! I like the polka dots, turquise would be nice, or red. Thanks for the ideas!